[ad_1]
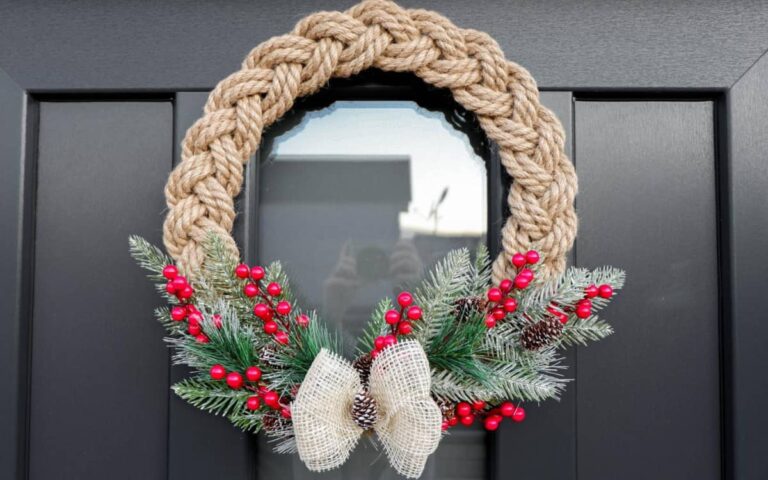
The festive holiday season is just around the corner and gorgeous decorations have started to appear all over. Most of us can’t help getting excited about all the different ornaments and Christmas lights, eager to decorate our homes. However, if you are also a DIY enthusiast, you might be walking around in the craft stores and decoration aisles, thinking “how could I make this at home?” Well, if this is the case, then you came to the right place. This easy tutorial from Buy Rope will show you how to make a simple, yet fancy-looking DIY rope wreath. This particular braided rope wreath is decorated for Christmas but it would be easy to substitute the appropriate seasonal decoration for different holiday rope wreath ideas. Are you ready?
How To Make A Rope Wreath

Tools Required:
Materials Required:
- 9 Meters of 10mm Jute Rope (about 30 feet of rope)
- 1.5 m wire or steel ring base
- 1m Jute Burlap
- Clear Tape (or any kind of tape)
- Decorated Garland
- Pinecones (optional)
When it comes to the rope, you need it to be 10mm or .4 inches thick. This ensures the rope be big enough to look make an impressive rope wreath without being too dainty or too bulky. Jute rope is a natural fiber rope that is nice and stiff and easy to work with and holds its shape well. A nautical decorative rope works just fine too.
Braiding Rope For Wreath
First, you have to measure out the rope you need for the project. Three pieces of 3 m rope (that is three 10 foot sections of rope) should be enough to make an average size wreath. You should fold each piece of rope in half and lay them down next to each other. You should now have three different sections of 2 strands of rope.

In order to be able to braid the ropes comfortably, you should secure the strands to a separate work surface using some tape. Start braiding by taking the left section over and pulling it over the middle section. Then repeat with the right section, and continue braiding until you reach the end of the rope and the ropes are completely braided.
Once you finish braiding the rope, use a hot glue gun to secure the ends to each other.

Don’t worry if it looks ugly – this section will be hidden by ornaments, so it doesn’t have to look perfect.
Creating Your Own Nautical Rope Wreath
Take your 22 gauge floral wire and use it to form a circle- about a 14 inch ring. You can make it double and twist if a few times in order to make it sturdier. Or you can use a pre-made metal wreath form from Hobby Lobby or the Dollar Tree.

Turn your wreath to its less aesthetic side – this will be the back. Use your glue gun to glue this side to the wire circle. Make sure to glue on multiple points.
You can make several nautical rope wreaths and use them to decorate each window if you like! They also make great DIY gifts.
Decorating The Braided Wreath
Take your garland and cut it up into several pieces. Alternatively, you can use real evergreens for this – especially if you don’t plan on keeping the wreath on display for months. It is best to have pieces with different length. I used two 8″ and two 5″ segments of garland.

Glue the longer pieces to the part of the wreath where you glued the ends of rope together. This will be the base of the decorations.

Start gluing the shorter pieces on top of the longer pieces. Keep gluing and arranging the pieces to your liking until you are happy with the results.

Take the burlap ribbon and fold it around the palm of your hand three times. Slip this off your hand and pinch it in the middle. Wrap a small piece of wire over around it in the middle to create a bow from the burlap. Divide the layers and fluff the bow.

Take the finished bow and glue it to the middle of the wreath. You can conceal the wire used to tie the burlap by attaching a small pine cone or other decorations to it with a hot glue gun.

Once the glue dries completely, your festive rope wreath is ready to hang on your door. Enjoy!

To mount your rope wreath on your door, you can use an over-the-door wreath hanger, a simple nail, or get more clever ideas here.
I hope you enjoyed these rope wreath ideas and the step by step tutorial with photos. This craft project will help you get into the festive mood – hang it on your door and show off your work to the world! It has a very nice, elegant look. Do you think you will make your own wreath? We’d love to see pictures if you want to share on social media @familyfocusblog
Related Posts:
[ad_2]